How to Make a Solar Powered Car Step by Step
If you're looking for a great gift for your children on their birthday, or even on any particular occasion, this mini solar-powered car will be the best choice. You can build this car using some easy-to-find materials. The best thing about this gift is that you will not only be able to educate your child about solar power but also, you will enjoy doing it yourself as well.
Here is a DIY tutorial for building a mini solar-powered car. It is easy to build with simple instructions. This will also include the list of materials that you need with the details in quantity and cost.
Contents
- 1 What is a mini Solar-Powered Car?
- 2 How does it work?
- 3 What materials do you need to build a mini solar car?
- 3.1 Small and Light-weight Solar Panel.
- 3.1.1 Tiny Solar Car Module Specifications
- 3.2 DC Motor.
- 3.2.1 DC Motor Specifications:
- 3.3 Tiny Car Wheels.
- 3.4 Mini Car Body or Platform.
- 3.4.1 Popsicle Sticks.
- 3.4.2 Drinking Straw.
- 3.4.3 Wooden Sticks.
- 3.4.4 On/Off Switch.
- 3.4.5 Plastic Wheel Driving Gear.
- 3.4.6 Rubber Band.
- 3.4.7 Ball Hinge (Optional)
- 3.5 Required Tools.
- 3.1 Small and Light-weight Solar Panel.
- 4 Step-by-step Guide to Mini Solar-Powered Car DIY
- 4.1 Building the mini solar car body.
- 4.2 Building the mini solar wheel part.
- 4.3 Attaching the mini solar car's engine (DC motor).
- 4.4 Attaching the mini solar panel part.
- 4.5 Attaching the mini solar car's engine starter (on/off switch and wiring).
- 5 Test Driving the Mini Solar-Powered Car
- 6 References
What is a mini Solar-Powered Car?
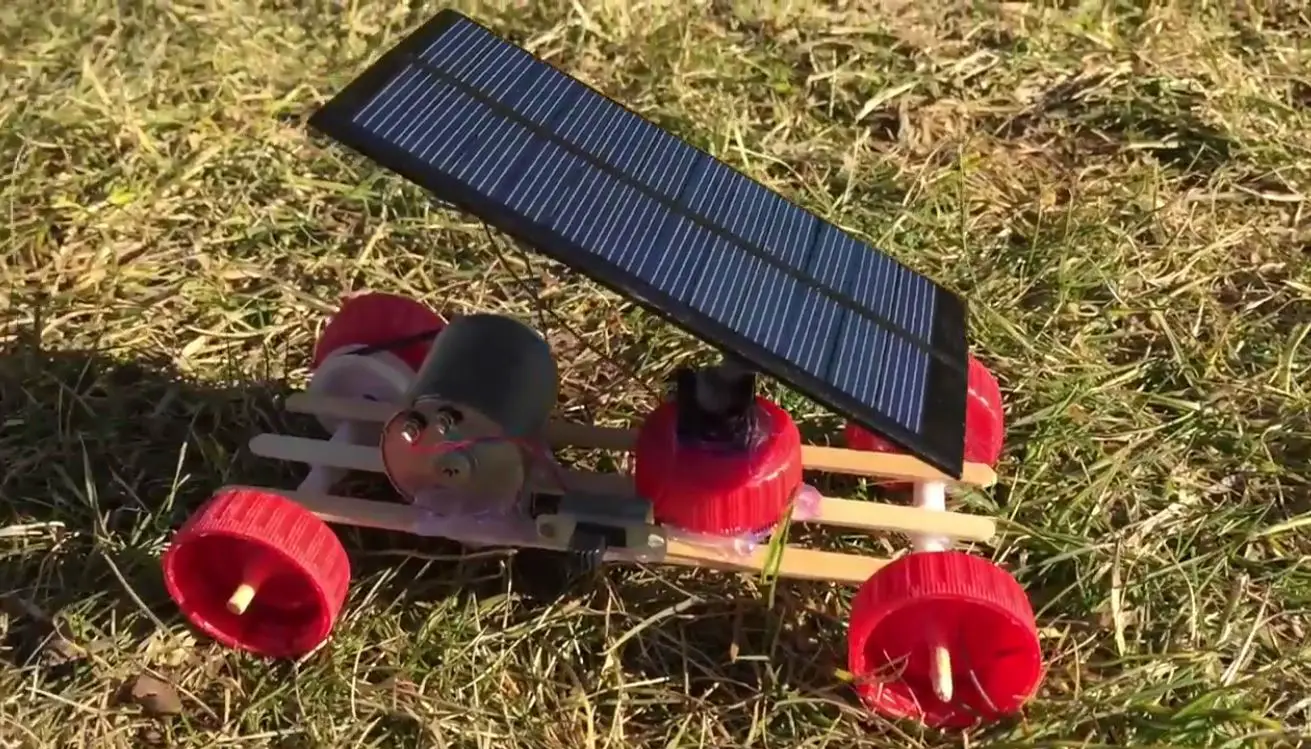
This is a miniature model of a vehicle that runs using a DC motor, small wheels, a tiny platform, and a small solar panel. It runs using only the sunlight which is converted into DC electricity which powers the DC motor. A mini solar-powered car can run at a speed of 5 km/h or more. Of course, this depends mainly on the solar panel capacity, DC motor, the total weight of the car, and the availability of sunlight.
How does it work?
A mini solar-powered car works solely using the energy from the sun. It uses a small and lightweight solar panel. This solar module will be tilted towards the sunlight and convert the sun's rays into direct current electricity. This electricity will give power to the DC motor. Then, as the DC motor operates, it will drive the wheels of the tiny car and make it run at a certain speed.
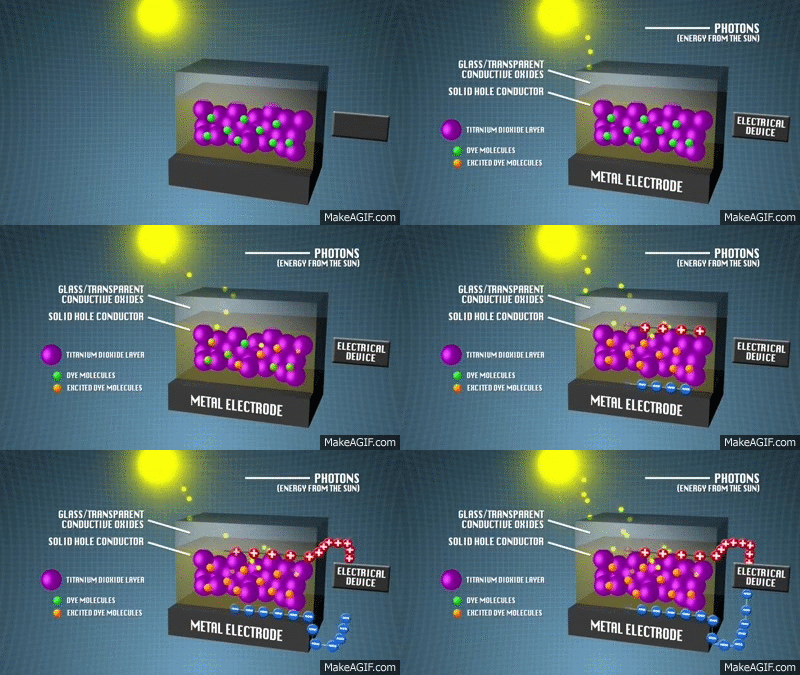
If you want to dive deeper into the topics about solar panels, you can check out this article about solar PV modules and how they work.
This tiny solar-powered car will stop only when it gets under a shadow or when something blocks the light source. This clip shows how it slows down and eventually stops under the shadow.

What materials do you need to build a mini solar car?
In this section, you will be able to know the basic materials you will need in building your tiny solar-powered vehicle. It can be found anywhere in your house, or you can easily buy it from the market or on an online store.
| Materials | Quantity | Cost |
| 3V Solar Panel | 1 pc. | $5 or free |
| 3V DC Motor | 1 pc. | $5 or free |
| Popsicle Sticks | 3 pcs. | $0 |
| Bottle Caps | 5 pcs. | $0 |
| Drinking Straw | 1 pc. | $0 |
| Rubber Band | 1 pc. | $0 |
| Plastic Wheel Driving Gear | 1 pc. | $0 |
| Wooden Stick | 1 pc. | $0 |
| On/Off Switch | 1 pc. | $0 |
| Ball Hinge (optional) | 1 pc. | $0 |
Small and Light-weight Solar Panel.
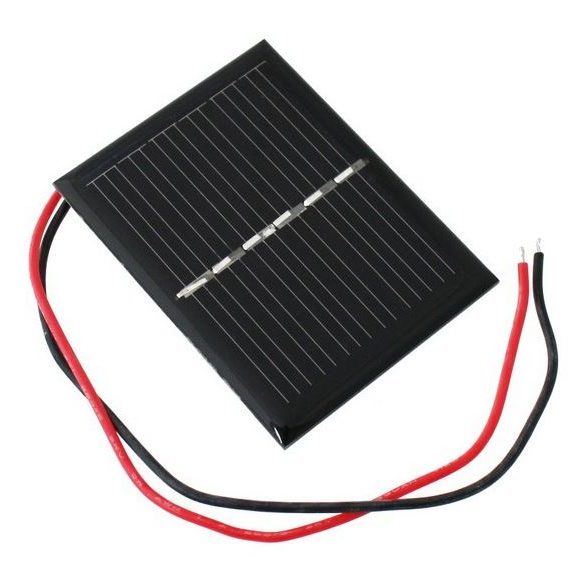
The lightweight solar panel is one of the main parts of this tiny car. This is the type of solar module that is usually being given as a giveaway during solar conventions or solar company events. If you happen to be at one of these events, grab the chance to get this item. Or, you may purchase it online or in the market for $5 on average.
This is actually a single solar cell PV module.
Usually, a 3V solar panel is used for this type of project. The reason is that this type of panel is small in size and does not weigh more than 20 grams. Thus, it is perfect for this project since it will power the DC motor without putting much load on a tiny car to carry.
Tiny Solar Car Module Specifications
- DC Output Voltage: 3V
- Max Power Output: 4.5W
- Panel Dimension: 80 x 70 x 3 mm (LxWxH)
- Weight (grams): 19g
Furthermore, this solar panel can be a mono-crystalline, a poly-crystalline, or a thin-film type of module. It includes 2 wires connected to its terminals. The red wire is for the positive terminal (+) while the black (or sometimes blue) wire is for the negative terminal (-).
DC Motor.
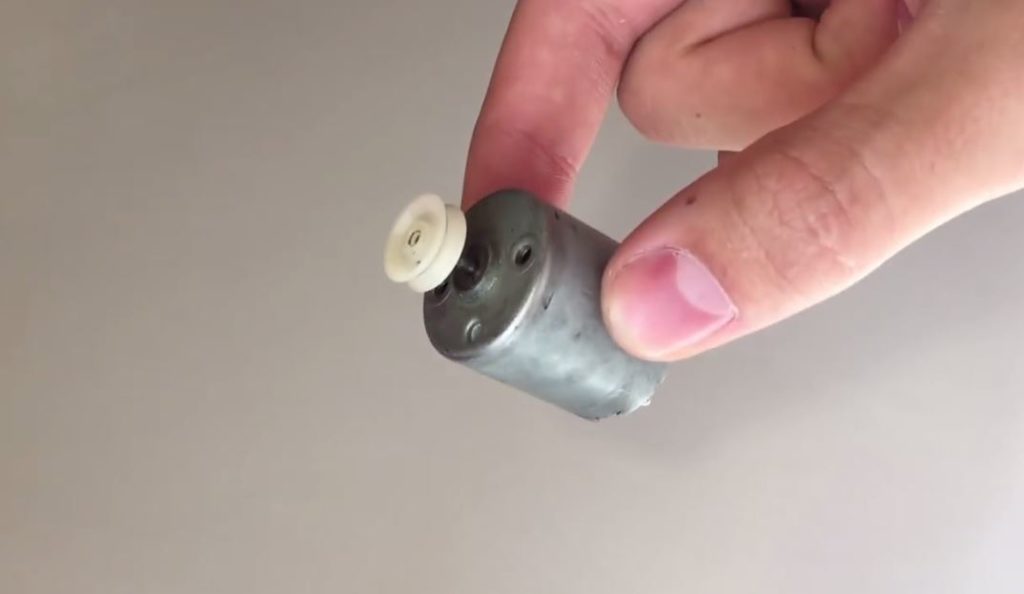
This is a type of motor which is small in size but able to exert enough rotational force to drive the wheels of the tiny car. You can say that this is the engine of your mini solar-powered car.
Normally, you will need a 3V DC motor for this project. This will complement the power that the 3V solar panel supplies. This motor can be found usually inside old printers, broken toys, etc.
DC Motor Specifications:
Voltage
- Operating range: 1.5-3V
- Nominal: 3V
No Load
- Speed: 12511rpm
- Current: 0.29A
At Maximum Efficiency
- Speed: 10012rpm
- Current: 1.16A
- Torque: 15.7gcm
- Output: 1.61W
- Efficiency: 42.36%
- Stall Torque: 78.4gcm
Tiny Car Wheels.

For this project, you can use the bottle caps from your favorite beverages. Make sure that you use bottle caps of the same sizes. These will serve as the 4 wheels of your solar-powered vehicle, the mini version.
Mini Car Body or Platform.
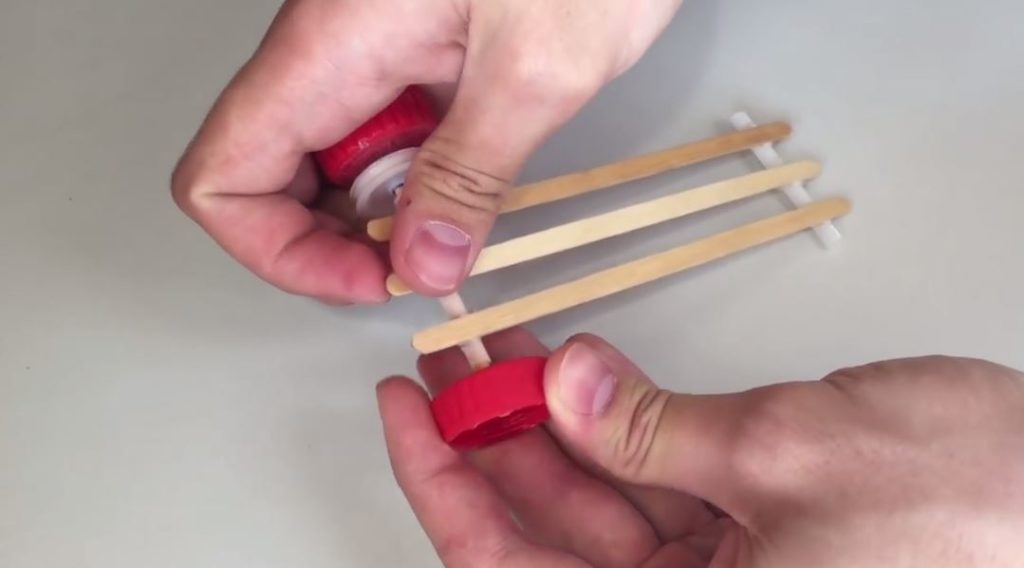
The platform which will be the framework of your mini car will be composed of different materials. Combined, they will form the main structure of your tiny vehicle.
Popsicle Sticks.
You will need light-weight objects to make your car run faster. As much as possible, you should not use materials that will contribute to the weight load. You also don't want to spend lots of money on super durable and light objects, like carbon fiber. For this reason, you will use the simplistic popsicle sticks instead!
This material is just perfect for this project. It is not only very light but also you can easily find it around the house. If anyone of your family members is eating some delicious ice pops, don't let them through the sticks right away.
Drinking Straw.
The plastic drinking straw will serve as the holder of the shafts which connects the 2 tires of your tiny solar car. It keeps them in place in such a way that they are still freely rotating as the wheels move. This serves as the connection point between the body and the wheels of the mini car.
Aside from being useful, this material is also readily available almost anywhere. By using the drinking straw as part of your project, you also promote recycling and reusing plastic materials. Thus, this project is also environment-friendly!
Wooden Sticks.
The wooden sticks will serve as the shafts that connect the wheels of your solar car.
On/Off Switch.
This will simply turn your mini solar car on or off. You can mount this on the middle right side of the car platform for easy access. You can easily find this from broken electronic toys.
Plastic Wheel Driving Gear.
This wheel driving gear is connected directly to the rear shaft and wheels of the car. The DC motor will drive this part and make it rotate, causing the vehicle to move forward.
Rubber Band.
This will serve as the rubber belt that will connect the DC motor and the wheel driving gear.
Ball Hinge (Optional)
This item is optional only. The ball hinge's main purpose is to adjust the tilt of the solar panel to whatever direction you like. By having a fixed solar panel angle, your solar-powered car will still be up and running under the sun.
Required Tools.
To do this DIY project, you will need a few more items. Here is the list of tools you will need successfully build the mini solar car.
- Hot glue device.
- Glue stick.
- Soldering rod.
- Soldering lead.
- Pair of scissors.
Step-by-step Guide to Mini Solar-Powered Car DIY
After preparing all the materials listed above, it is now time to build your tiny solar car. With this tutorial, you can successfully complete this project.
Building the mini solar car body.

- Cut two pieces of drinking straw with a length of around 2 inches (or 5 cm).

- Using the hot glue device, glue 3 pcs of popsicle sticks on the 2 cut pieces of drinking straw. Place 2 sticks in the 2 sides and 1 in the middle.
Building the mini solar wheel part.

- Now, prepare the wooden shaft or stick, the car platform and the plastic wheel gear.
- Create center holes for the 4 bottle caps.

- Insert the wooden shaft inside the straw on the rear. Then, insert the plastic wheel gear and then the 2 bottle caps on each end of the wooden stick/shaft.
- Next, insert the other wooden stick to the straw on the front. The remaining 2 bottle caps will also be placed on the front shaft's 2 ends.
Attaching the mini solar car's engine (DC motor).

- Now, it's time to mount the DC motor to the car body. But before that, connect the DC motor and the wheel gear using the rubber band. Then, fix the DC motor using the hot glue.
Attaching the mini solar panel part.

- Fix another bottle cap on the car body right behind the DC motor. The ball hinge will be mounted on this bottle cap so make sure to make necessary holes for it.

- Now, fix the ball hinge on it. Make sure to add enough glue for it to be firm.

- After that, apply glue on top of the ball hinge and fix the solar panel on it. Make sure it is firmly fixed and it will not fall anytime.
Attaching the mini solar car's engine starter (on/off switch and wiring).
- Time to wire the solar panel, the switch and the DC motor. Make sure that you connect the negative wire of the solar panel to the negative terminal of the DC motor. Then, connect the positive wire of the solar panel to the first terminal of the on/off switch.
- Next, connect a wire from the second terminal of the switch to the positive terminal of the DC motor. Make sure to use proper soldering materials to solder the connections.

- Fix the on/off switch to the side of the car body where it can be easily accessed.
Test Driving the Mini Solar-Powered Car

Now that you have attached everything that is essential, it is now time to hit the road. By allowing the sunlight to reach the solar panel, your mini solar car will be ready to go. By simply flipping the switch to on position, you will see it running using no other fuel but the solar energy.
References
How to Make a Car – Mini Solar Powered Car (source)
Other inspirational videos.
How to Make a Mini Solar Car!
Like us on Facebook!
Summary
Article Name
Mini Solar-Powered Car DIY - Easy to Build (With Pictures)
Description
Learn how to build a mini solar-powered car with this complete tutorial. Know the materials and tools needed to successully create a tiny solar car project.
Author
Super Human
Publisher Name
Solar Powered Blog
Publisher Logo
![]()
How to Make a Solar Powered Car Step by Step
Source: https://solarpoweredblog.com/mini-solar-powered-car-easy-to-build-with-pictures/
0 Response to "How to Make a Solar Powered Car Step by Step"
Post a Comment